Getting Started
This guide walks you through your first export with XPress.
Prerequisites
Section titled “Prerequisites”- XPress is installed on your site.
- You have at least one space with pages to export.
The quickest way: Apps → XPress
Section titled “The quickest way: Apps → XPress”Open Apps → XPress. The pages edited most recently are already listed, and the search box finds any other page by its title. Pick a page and the Will export panel shows what you are about to get: the template it will use, the paper, and whether it has a cover, a contents page and a watermark.
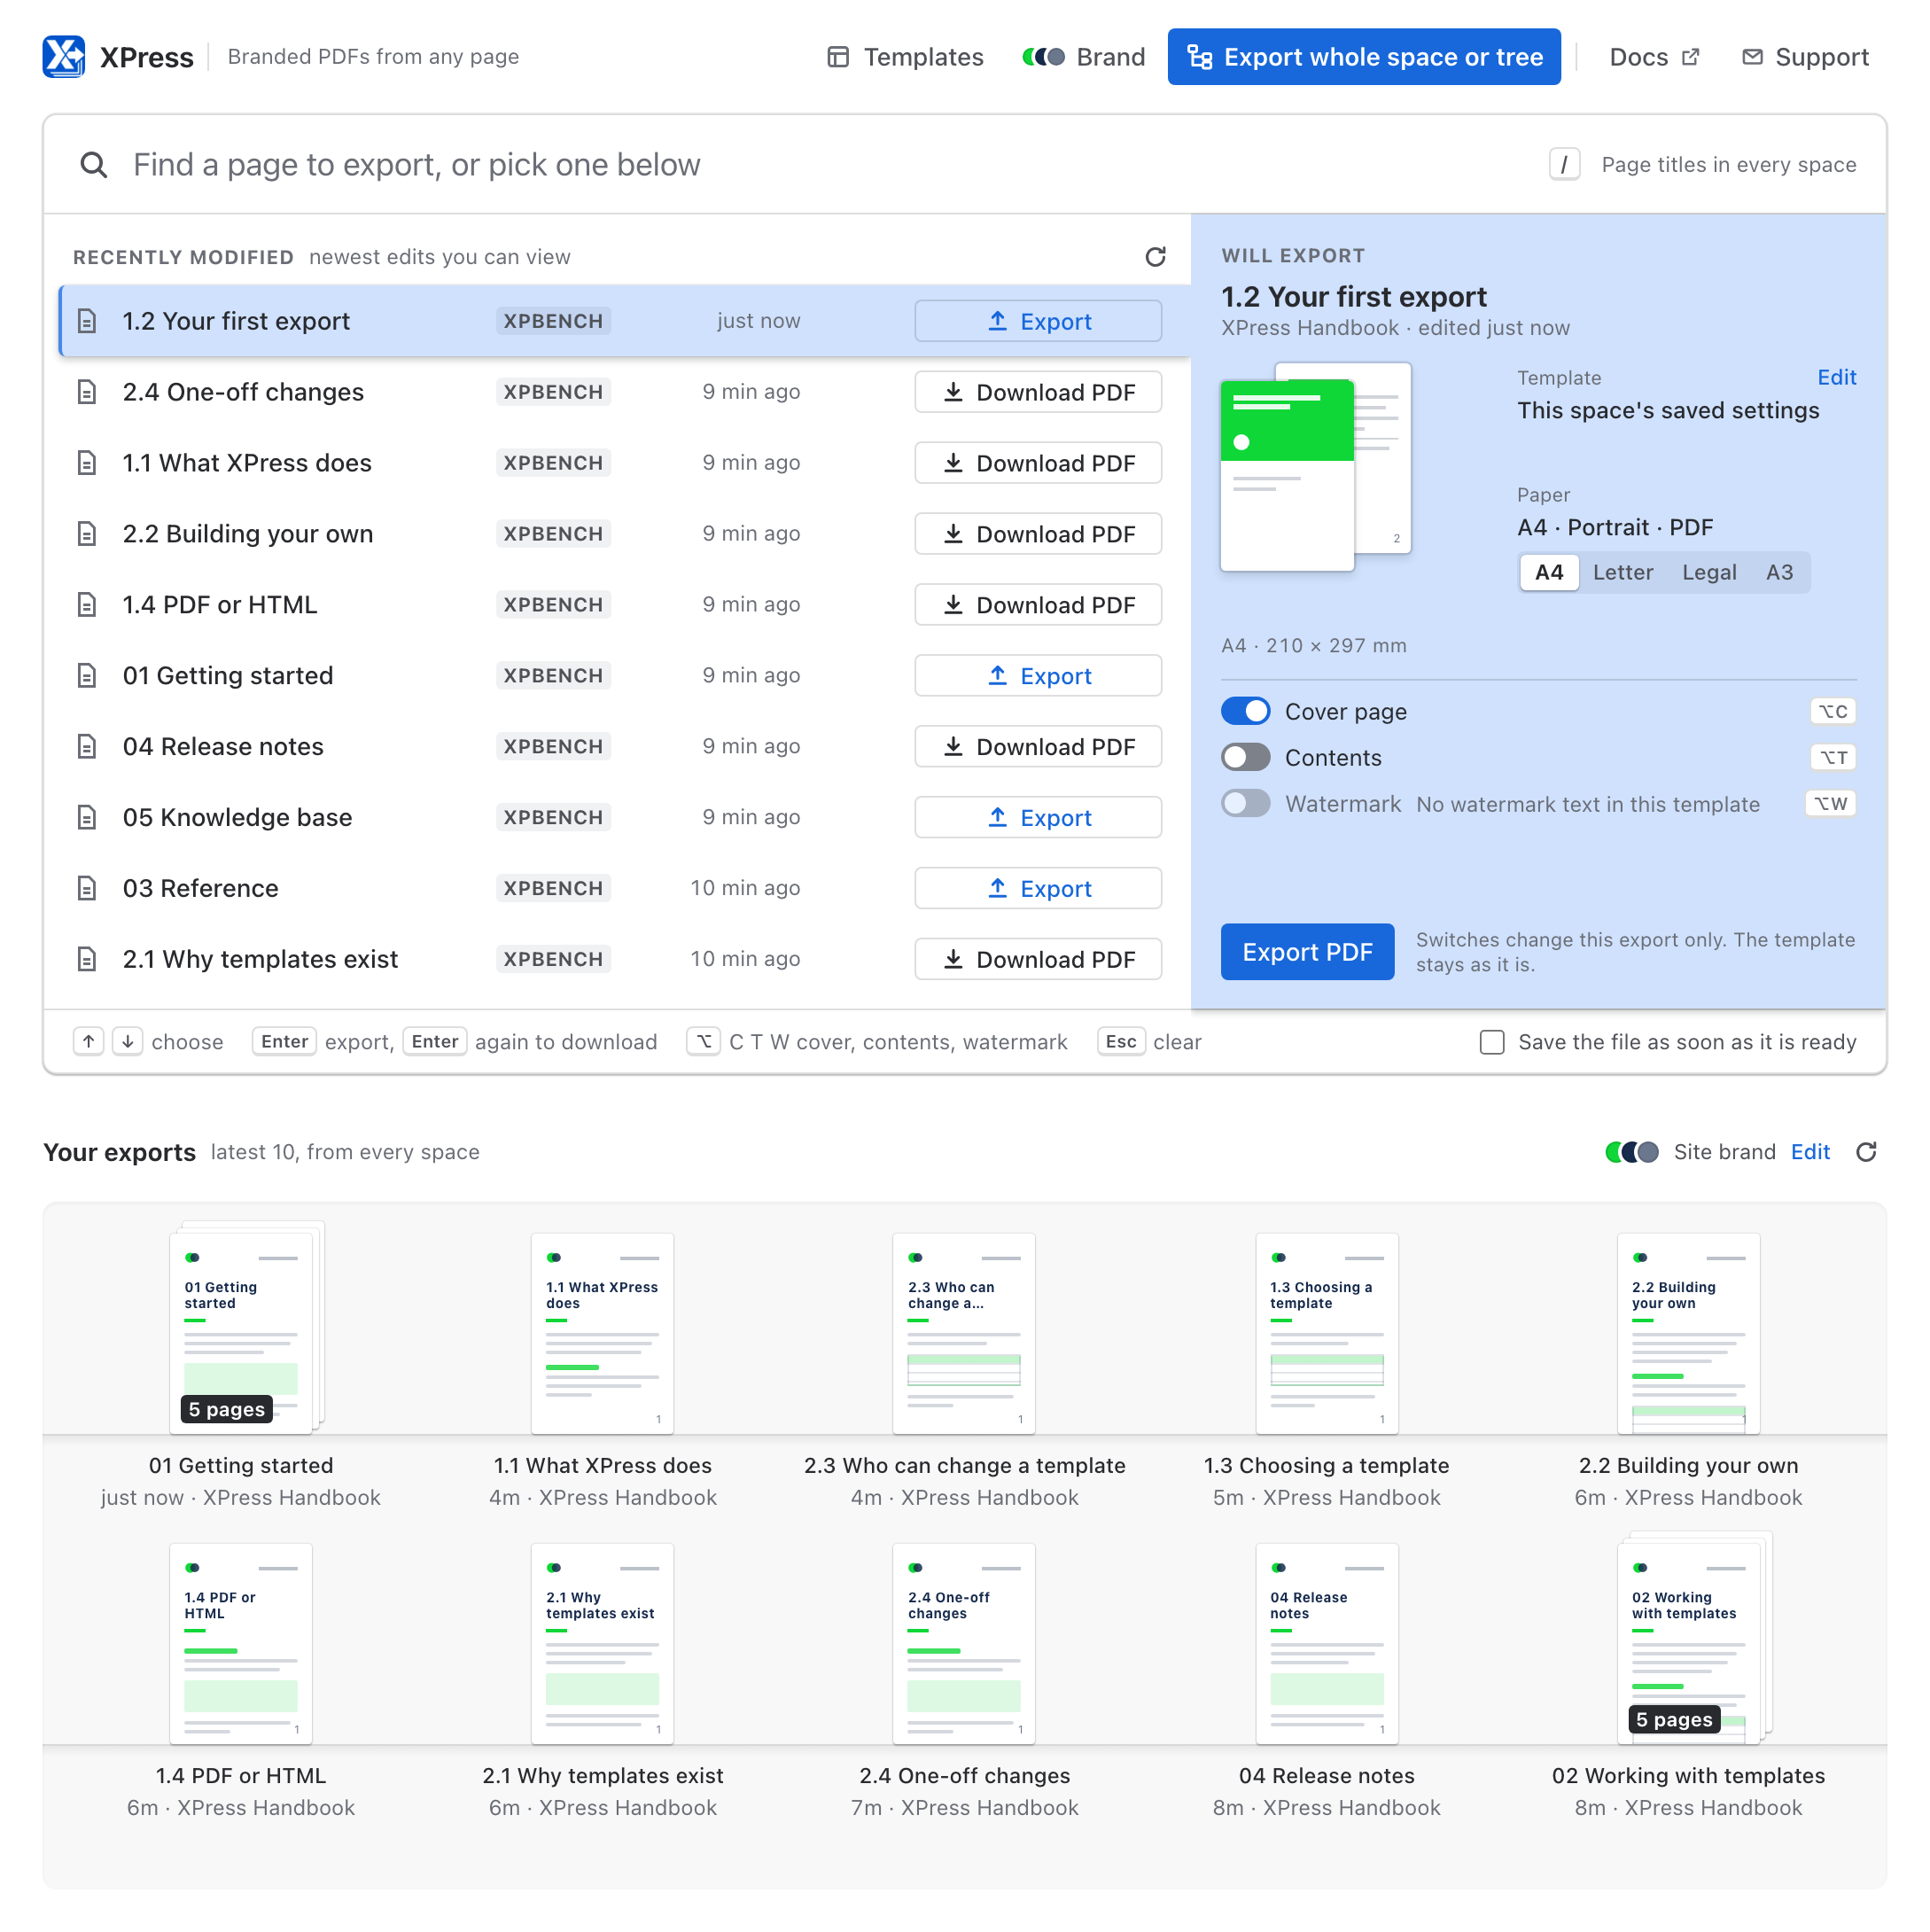
Press Enter, or Export PDF. The export runs right there in the page’s row, and when it is ready, Enter again downloads it. It comes out in the same template the page’s own Export to PDF uses, so there is nothing to set up first. Every page also carries that Export to PDF, in the byline and in the ··· menu.
Your document also lands on the shelf below the list, Your exports, where it waits to be downloaded again. Until your first export, the shelf holds a faint proof of the page at the top of your list, ready to be printed.
The rest of this guide takes the fuller route, in a space, where you choose the pages, the template and every setting yourself.
1. Open XPress in a space
Section titled “1. Open XPress in a space”Open any Confluence space. In the left-hand sidebar, click XPress.
The XPress page loads with two tabs at the top:
- Space Content - pick the pages you want to export.
- Exports - history of your previous exports in this space.
You start on Space Content.
2. Pick what to export
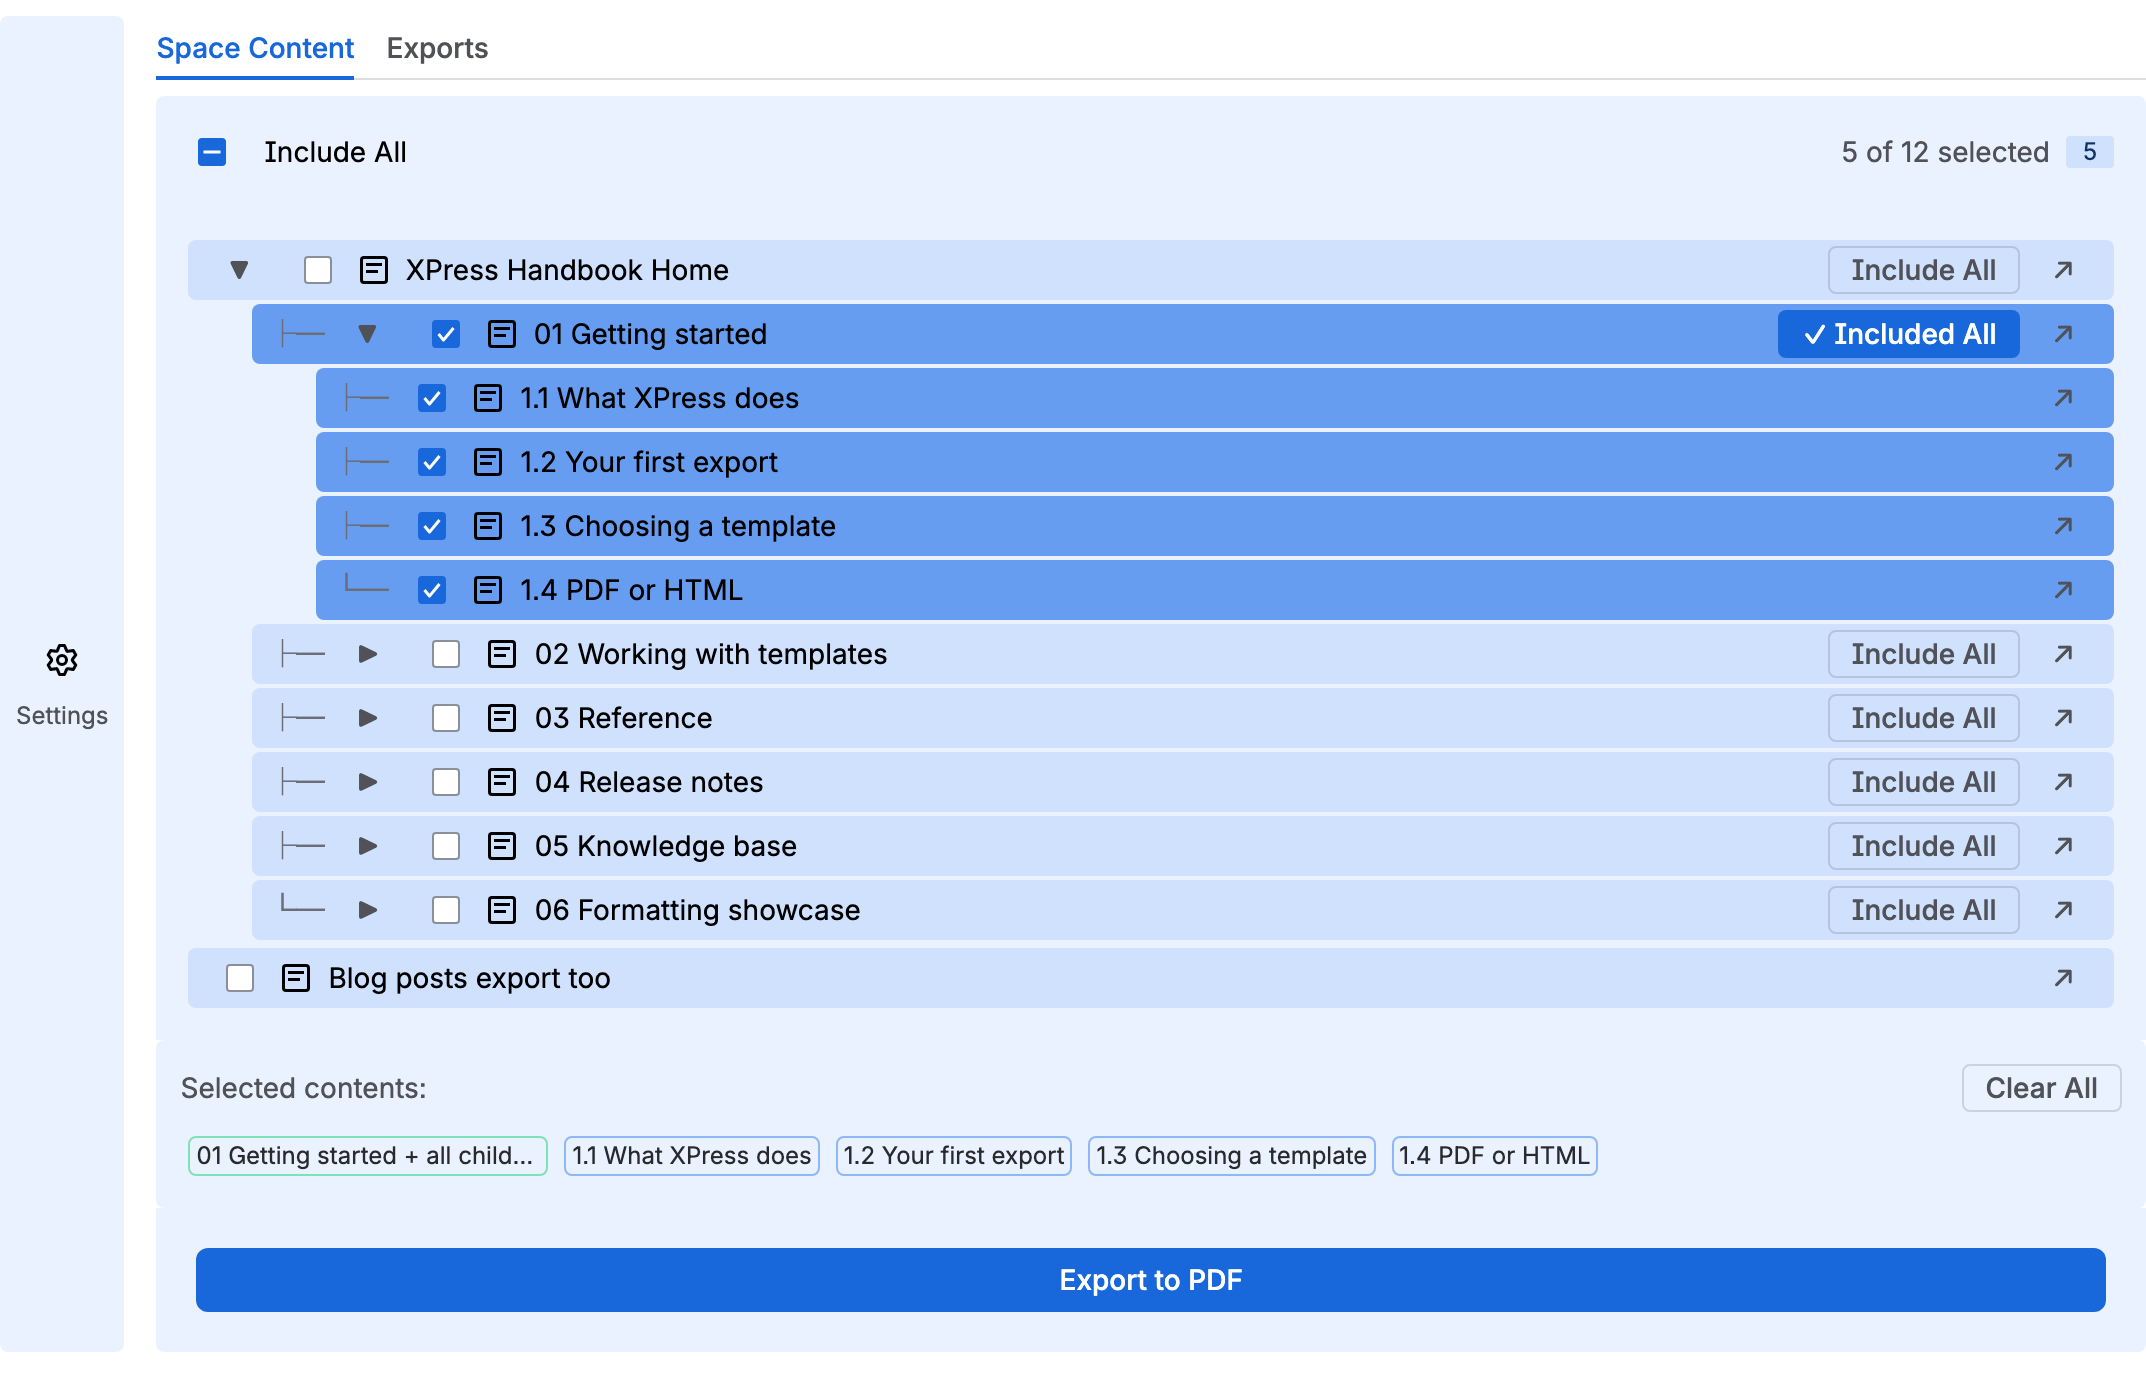
Section titled “2. Pick what to export”The main area shows the space’s page tree.
- Click a checkbox to include a single page.
- Click “Include All” next to a parent page to take that page and the branch under it. A very large branch is trimmed to what one export can carry.
- Select-all bar at the top of the tree picks everything in the space.
- Selected pages are listed as tags below the tree, with a Clear All button beside them. To drop a single page, untick it in the tree.
Use the small ↗ open icon next to any page to open it in Confluence in a new tab.
3. Choose a template
Section titled “3. Choose a template”A template decides what your document looks like - the cover, the header, the margins, the watermark. Open the Settings panel on the left of the XPress page and pick one from the Template dropdown. That is the whole step; you do not have to configure anything.
You already have four to choose from:
- Simple document - clean A4 portrait, the everyday choice
- Report with cover - adds a title page and a linked contents page
- Confidential - a watermark on every page, plus a CONFIDENTIAL header and a Do not distribute footer
- Wide (landscape) - landscape with tight margins, for big tables
If your space already has a default template, it is chosen for you and marked Space default.
4. Adjust this one export (optional)
Section titled “4. Adjust this one export (optional)”Need something different just this once? In the Settings panel, choose Adjust for this export and change what you like:
- Format - PDF (default) or HTML
- Paper Size - A4, Letter, Legal, A3
- Orientation - Portrait or Landscape
- File Name - what the file is called when it lands; leave it empty and it takes the page’s title
- Cover Page - a title, subtitle, and your logo as the first page
- Table of Contents - a linked contents page listing every exported page
- Header Text / Footer Text - free text at the top / bottom of every page (PDF only)
- Page Numbers - on or off, in the corner you choose (PDF only)
- Margins - Top / Right / Bottom / Left in millimetres, each adjustable on its own
- Watermark - diagonal text such as DRAFT, with position, opacity, rotation and size
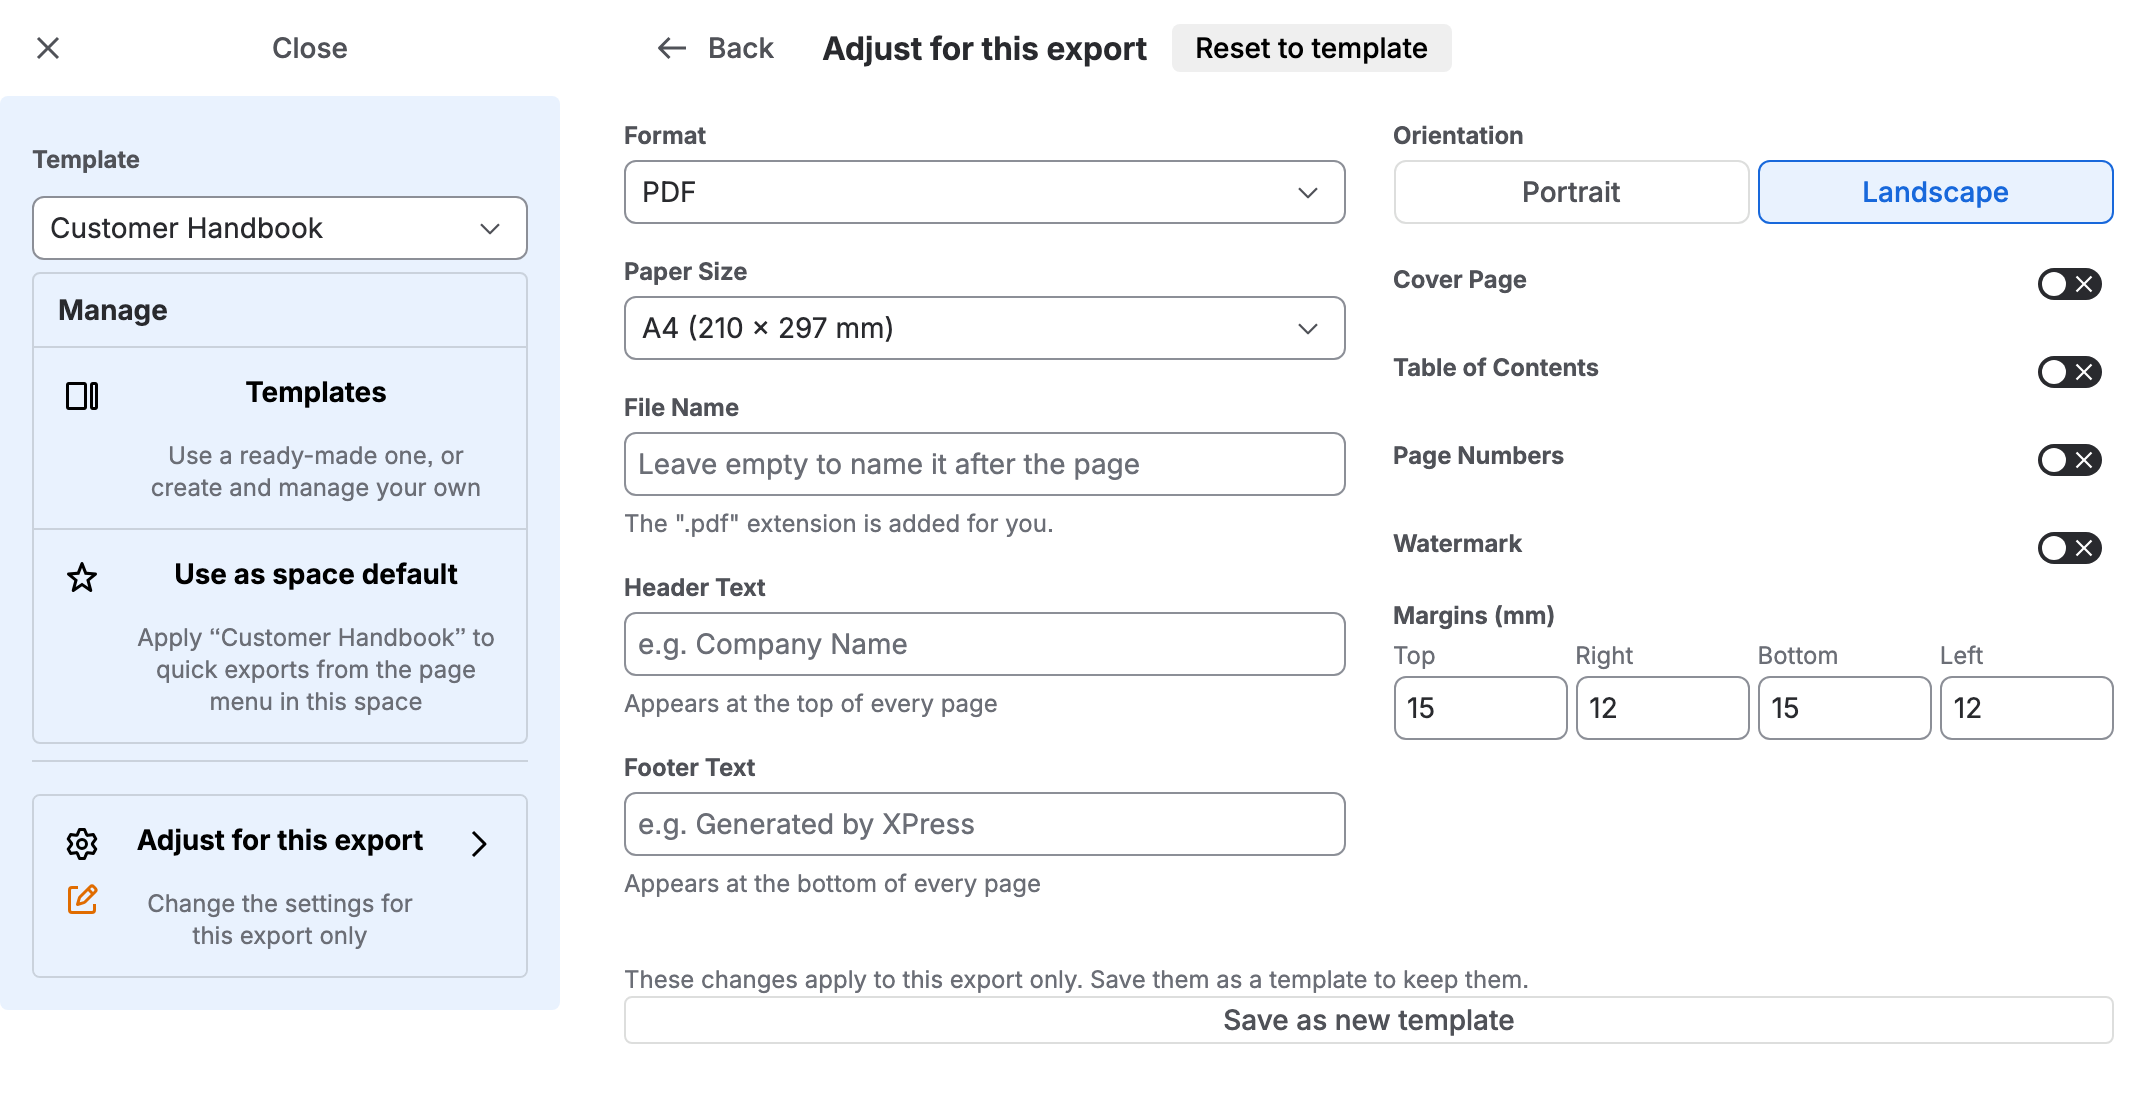
Your changes apply to this export only - the template itself is left alone, and the settings panel flags that you have moved away from the template, with Reset to template to go back.
The settings last used in a space are remembered for the next person who exports from it, but the template you pick still decides anything it defines.
5. Export to PDF
Section titled “5. Export to PDF”With one or more pages selected, click the Export to PDF button at the bottom of the page tree.
XPress starts the export and shows a progress bar. A few pages take seconds; a large bulk export with lots of images takes longer, and you can watch it progress.
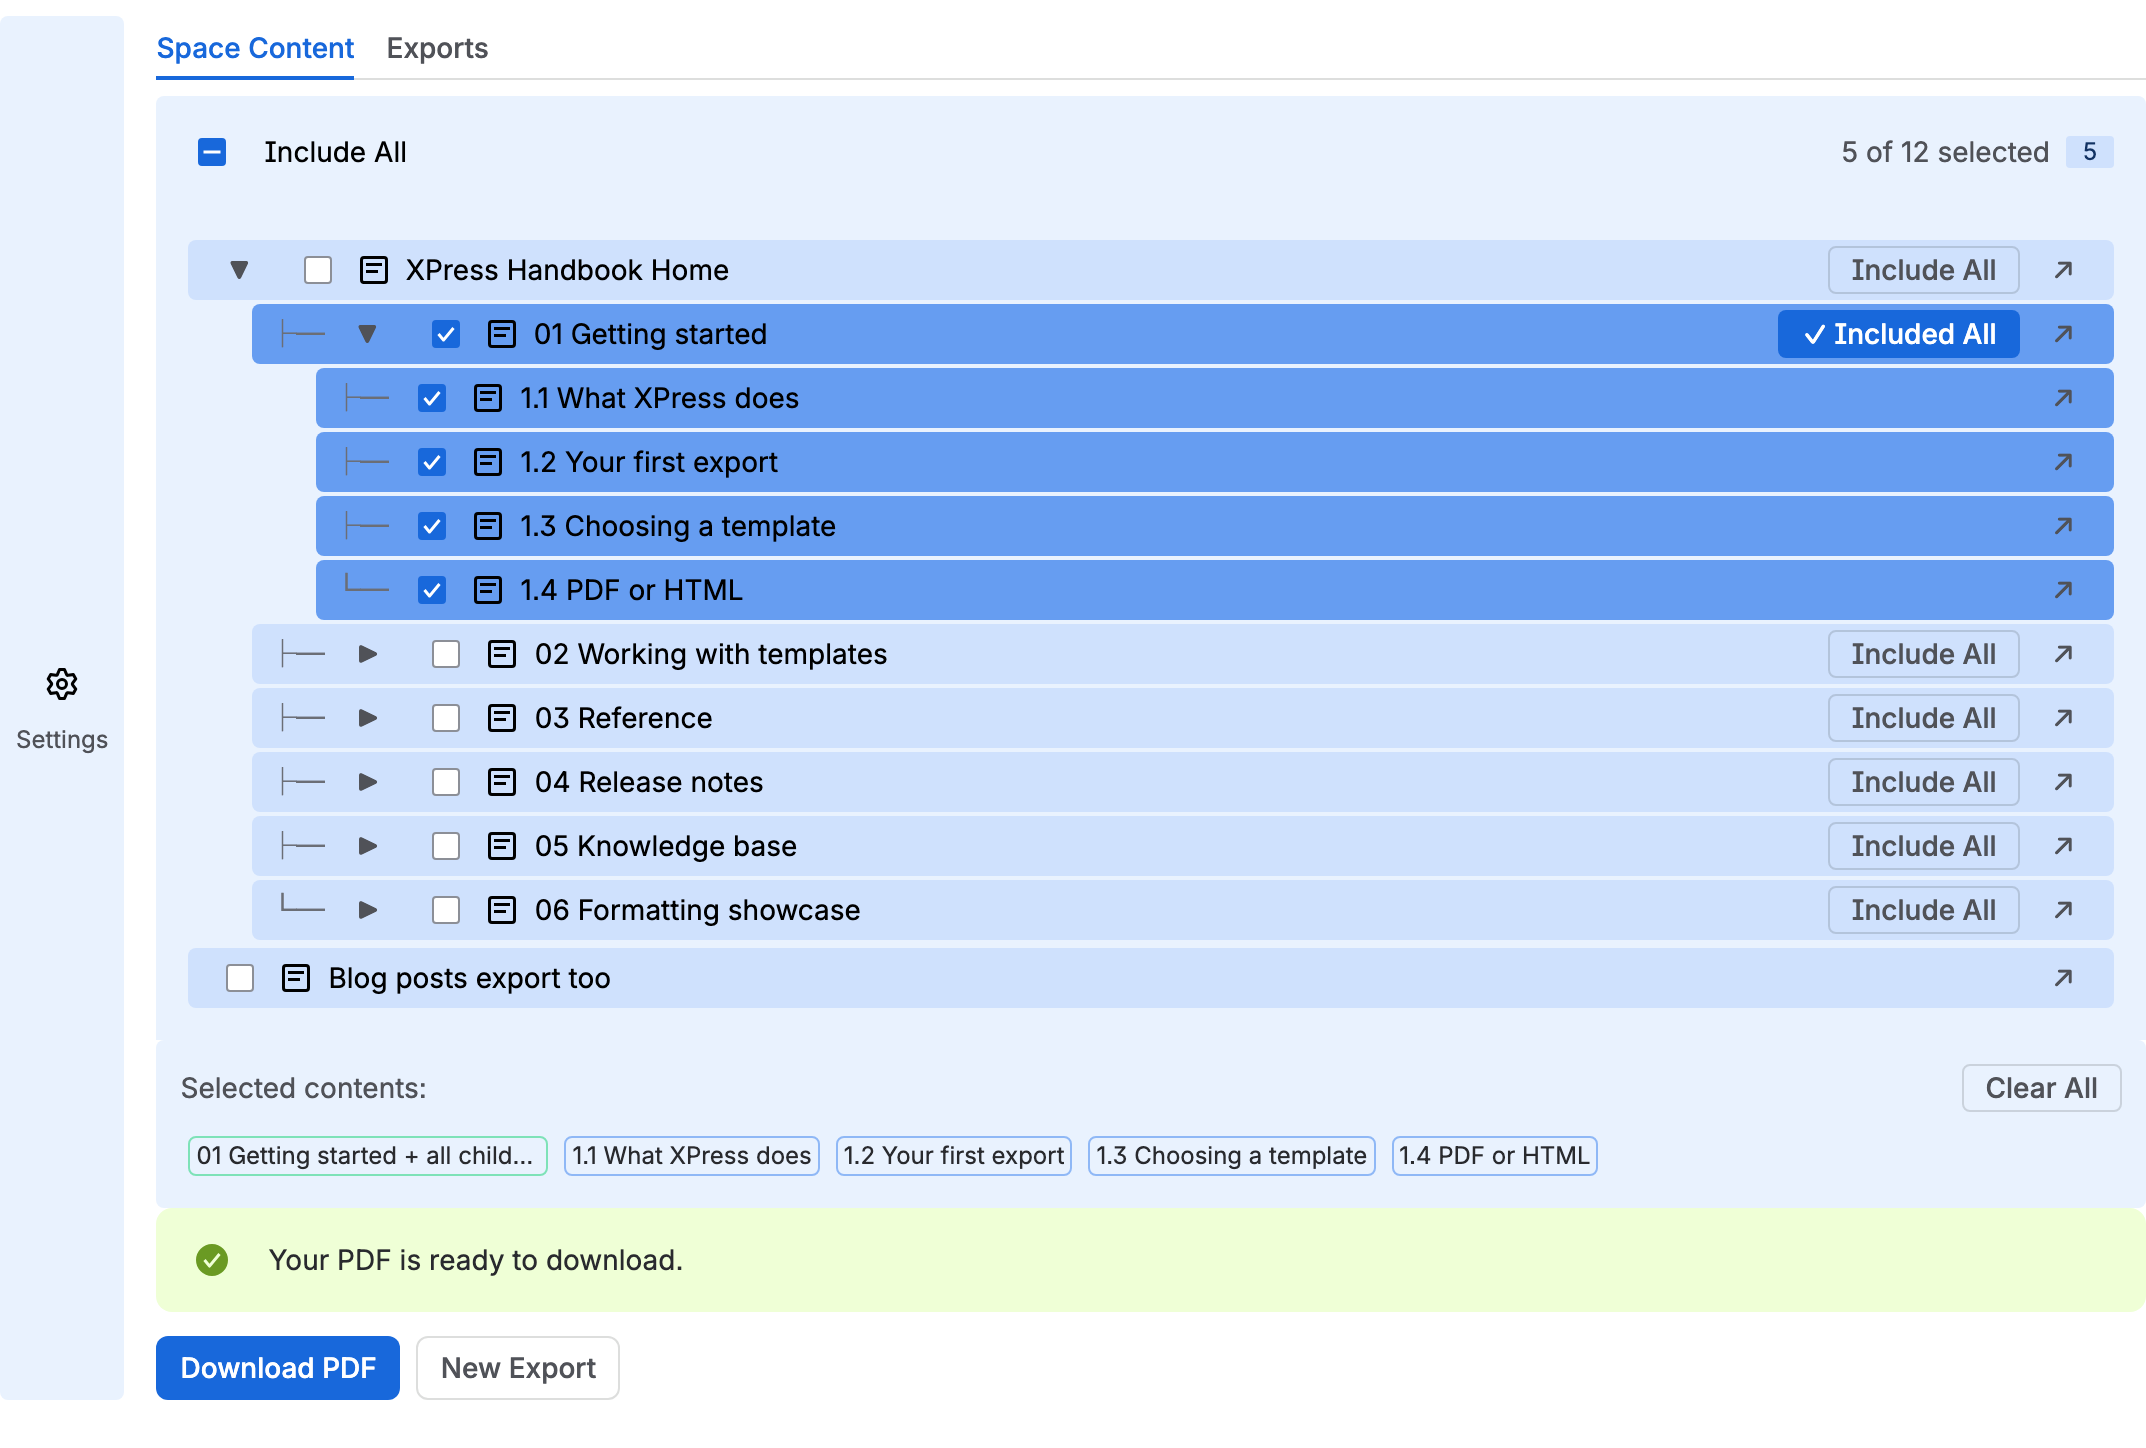
When the export completes, you’ll see:
- A Download PDF button - one click and the file is yours.
- A New Export button - clears the result and brings back Export to PDF with your pages still ticked, ready for another run.
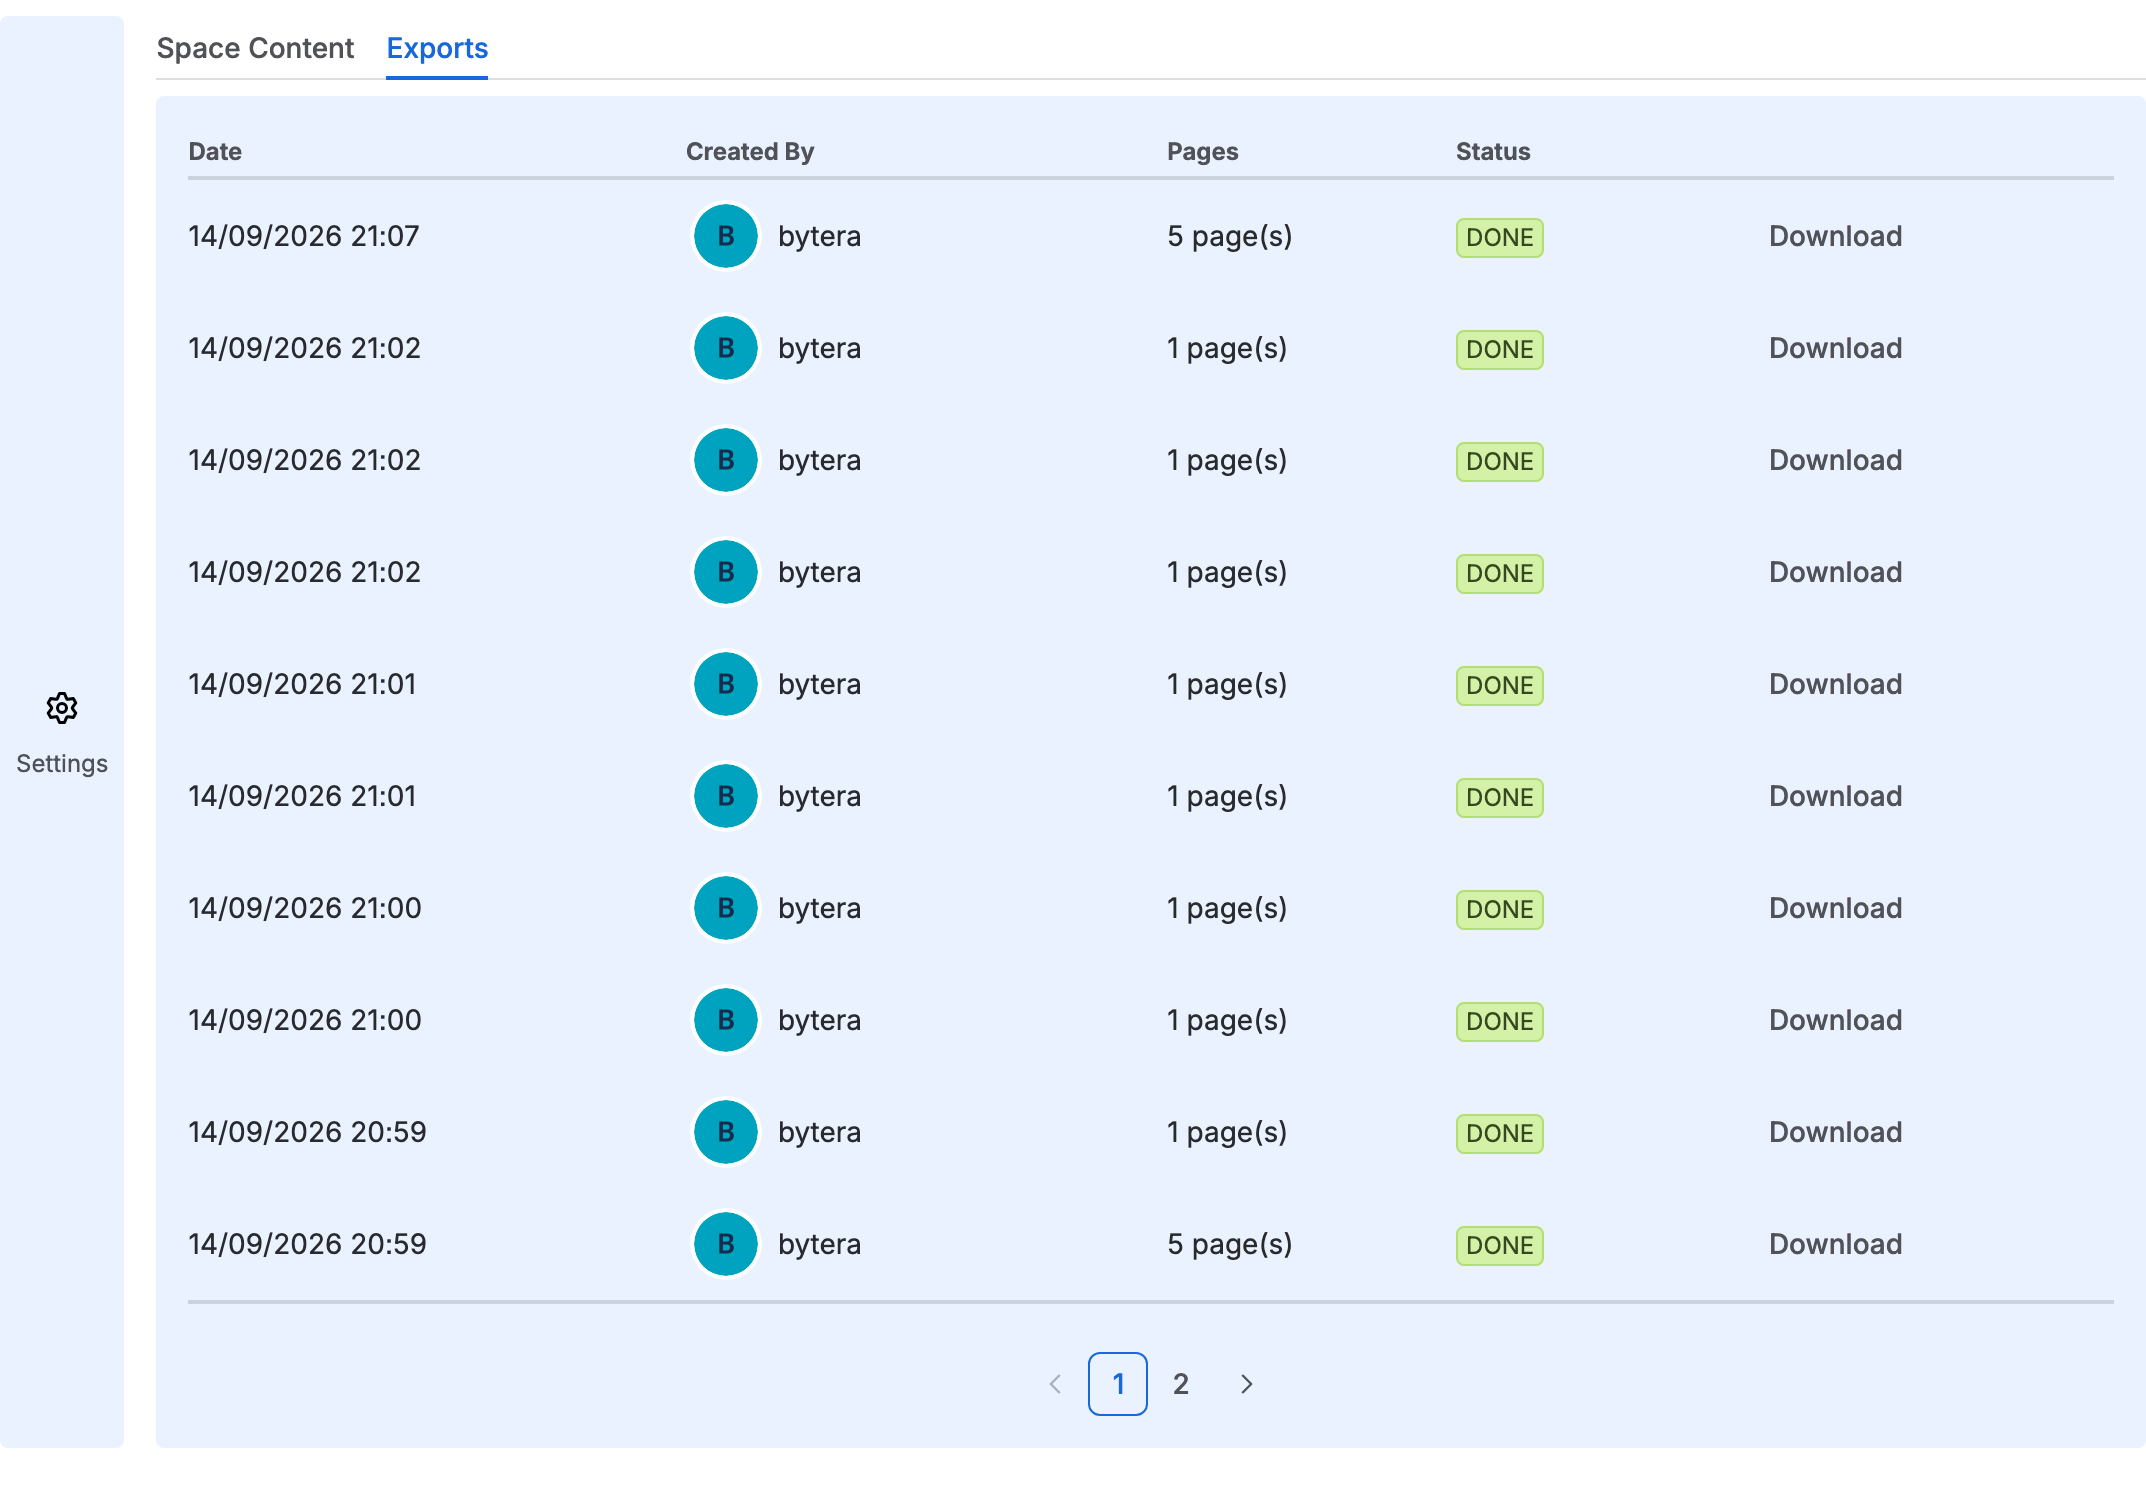
6. Find an older export
Section titled “6. Find an older export”Click the Exports tab. You’ll see the last 20 exports for this space, with:
- Date - when the export was created
- Created By - who ran it
- Pages - how many pages went into the PDF
- Status - DONE, QUEUED, PROCESSING or ERROR
- Download - for successful exports, a link to re-download the PDF
Your own latest exports, from every space, also wait on the shelf of the XPress page under Apps - see Export History.
What to do next
Section titled “What to do next”- Build your team’s own export template so every document matches - Export Templates.
- See how bulk export handles whole spaces - Bulk Export.
- Configure headers and page numbers for branded documents - Headers & Footers.
- Set non-standard paper size and margins - Page Layout.
Stuck? See Troubleshooting & FAQ or email support@bytera.tech.